Overview of Quick Sale buttons for versions 3.100+
Quick steps to create your first button
Because there are many components to the 3.100+ version of Quick Sale buttons (QSB), we offer you this quick step overview to help you get up and running and understand the basics of adding QSBs. You can use the help or learn the nuances of the QSB later as needed. Here are the things that you MUST do to get started after you have logged onto Online Options with the proper permissions set:
-
IMPORTANT: To be able to create buttons, you MUST create a profile or select a profile and you must select or create a Page first. Click the respective links above to see the topics below.
Scenario Example
|
Let’s say you wanted to just add one simple page of QSB because you are just selling seven different beers on your Bev Cart. In this case, you could quickly create a Beer Bev Cart profile, add a Page called Beer7 and then add those seven beers:
|
To navigate to the Quick Sale Button setup page
You must be updated to the 3.100 version of Online Options to see the new Quick Sale Button page. Also, you must be running the 3.100 version of CPS Air.
To work through a tutorial on how to navigate to the QSB page, click here>>
-
Go to the Online Options site and log in as an admin or with the proper permissions.
-
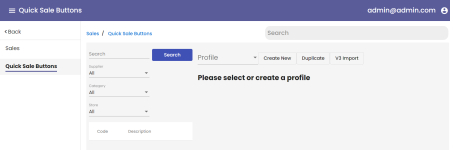
Under the Main hamburger menu, select Sales then Quick Sale Buttons. The Quick Sale button page displays.
From here you can do the following:
-
Create New - to create a new profile
-
Duplicate - to duplicate an existing profile
-
V3 Import - to import QSB from your terminal
Note: Once you are on this page, you can navigate to and from submenus and pages after you have created them. The navigation for that is covered here>>
To create a new profile
You can create as many profiles as you want by name so your QSB can be built and then quickly implemented. You need only select a new profile from the Terminal settings drop-down on the web to make the change.
So for example, if you want to use the iPad for F&B in the evening for the dinner rush, you can create a profile for that, and select it as needed. But if you want to use the same iPad for golf reservations and check-ins, you use the golf profile you created.
IMPORTANT: To be able to create buttons, you MUST create a profile or select a profile first! Also, you must select or create a Page as well.
-
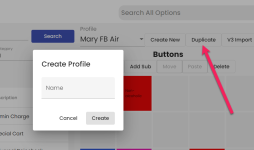
Go to the Quick Sale Button page, and select the Create New button. The Create Profile pop-up box displays.
-
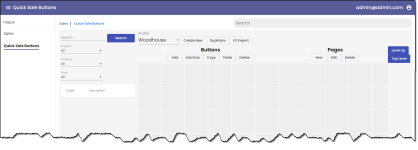
Enter a descriptive name in the Name field and click Create. The QSB page displays the Buttons and Pages editing area with blank buttons and pages. Remember: The buttons you are creating are for this profile, which will be for a certain sales situation, like F&B or your pro shop, therefore create accordingly.
-
Add Pages, buttons, and submenus for this profile.
Note: There are no Save buttons on this screen because every action autosaves. If you go to another page, you are asked to confirm the change.
-
When you are ready to use this profile on an iPad, do the following:
Note: The iPad must have been an approved terminal before you can do this.
-
At your Online Options site (version 3.100), log on as someone with permissions.
-
Under the Main hamburger menu, select Options then Terminal Options. The list of available terminals displays to the right.
-
Scroll down to your iPad and select it. The options for that terminal are to the right.
-
In the Quicksale Button Profile section from the Profile drop-down, select the profile you created or the desired profile for this iPad to use.
-
Click Save when you are finished.
-
To duplicate your profile
-
At the Quick Sale Button page, select the profile you want to copy.
-
Select the Duplicate button on the top row of buttons. The Create Profile button displays.
-
Enter a new descriptive name in the Name field and select Create. The new profile’s name displays under the Profile field with the same setup as the profile you selected to duplicate.


